Tuesday, March 31, 2009

Walking the Talk Day Two

The first half of the day was beset with internet problems but between the IT teacher and the technician at the school everything was running smoothly for the second half. It is difficult to run a programme that is heavily internet based when the internet is not working well, so that was a good lesson for me. If you want your students to work on computers during this time then have a back up plan in place.

In maths the children are working on perimeter, area and volume. Luckily in their Assessment sheets they have plenty of other activities they can be doing when the internet falls down, but I will need to put some more non-internet computer activities in a folder for them. I have plenty of numeracy ones that I have written for their level so I will have those on standby.

I ran the perimeter Workshop today, or I should say the kids did! They took over the mimio pen and worked through the notebook pages. They didn't really need me, once they knew how to work it out! Which left me able to wander around and see what the other students were up to.

The expectations I have for the children is for them to become self managing with their learning. They have to work out what they need to know and plan when they are going to complete their tasks.
Here is the example of the perimeter tasks and area tasks.
They have internet sites, some of which can be accessed with the Wii, PSP and iTouch. So far we have used the Wii with great success. The school has an LCD screen on wheels, which I have grabbed everyday, one of my students sets it up which takes about 2 minutes. He goes straight to the internet, and then to our favourites and then to the class Delicious site that the classroom teacher Julia, had set up previously. I have organised it into some Curriculum areas and group folders with more to be added soon.
The students can easily access all of the websites their teacher and I want them to access. We have set up all the home pages on the computers to go to this site as well. It is also a great site to send children to for homework (which I did tonight!). Purchasing a Wii for around $400 is a cheap option for creating another access point for internet. Some schools have taken it further such as BBI in Auckland and are using the Wii as an interactive whiteboard. The Wii in the class is a popular option, children are using it for learning games and will be using it for searching the internet. Today Julia and I observed 'one character' multi tasking, he was listening to an audiobook on the ipod and playing a reading game on the Wii, but more on that later!
I soon realised that the children need a lot of help in 'becoming self managing'...particularly the boys! They go for the fun options first while most of the girls, were doing the activities that would improve their understandings of the concepts. There is going to have to be more direction for these students. They also needed to be reminded that they have to sign off their tasks as they do them. Am I expecting a lot? Yes, but they will get there with perserverance on my part.

Writing and Reading time was whirlwind, children are having to come to grips with the routines and also the self managing of what tasks to do. I will go into this in more depth in later posts.

In the afternoon we carried on with more Inspiration activities leading up to their Research topic. These students have grasped the technical skills of Inspiration incredibly quickly, you show them once and they are away. We just need to work on the content some more!

Monday, March 30, 2009

Walking the Talk Day One

Today was the first day of my 'Walk the talk'. I am teaching in a Year 5/6 class for 2 weeks (first 4 days of each week).
This is a Decile 10 school, with very capable children. It was a totally mac school until the recent purchase of some linux netbooks. The class of 28 children has 3 E-Macs and 1 teacher laptop. I have taken another iMac, a Windows computer and 4 Windows laptops and and a netbook. I was able to get them all onto the internet which is great as most of my planned programme is Internet based.
The most exciting thing for the students was the LCD TV and the Wii. They all thought they were going to be jumping around playing tennis and bowls, but that rumour was quickly dispelled as I showed them how it can access the internet wirelessly and I had some maths games bookmarked.
It was also noted that I had iPods, iTouch, and a PSP.
Once I set up the computers and the mimio, the children started filtering in, the first child was a bit of a character and very interested and capable with all things digital. He has become my main man and by the end of the day, he was teaching others how to use the mimio, access the internet sites on the Wii, save files to memory sticks and any other troubleshooting problems that arose. His job is to now train another person, and then it will snowball from there.
I showed the children my planning and told them how they could access it from my computer. My 'main man's' job is to get it set up in the morning from now. I set the routines of
1. Before School 3 different people per day have to click on the Morning Routines, one to look at the Weather, one to pick a news headline and one to find out what happened this day in History. I showed them how to Screen Clip the item they want to share to a new page in the mimio Notebook.
We needed to discuss how you need to read what you are going to screen clip so that you understand it enough to read and talk about with the class.Will be interesting tomorrow to see how the kids cope with it.
2. I showed them their spelling words which will be on the screen for them tomorrow, and set the routine of Bells ring - come in - start Handwriting card - move on to Spelling activity (on screen) - practice Keyboarding which will be on the Wii. More about this tomorrow!

This school streams their maths classes, so I lost most of the kids to other classrooms and had to train up a new lot. These are very able top stream students and seemed quite taken aback when I told them they were going to be teaching themselves, managing their own learning and booking me when they needed help! I gave them a pretest I had created on perimeter, area and volume. We then marked it and they had to write down on their Student Assessment Tracking sheet what areas of the test they needed to work on more. I showed them all the activities that were going to available in books, worksheets, computers, internet, Wii, PSP and iPod Touch. Tomorrow is when they have to come in, choose their activity or learning opportunities. I have told them I will be running a Perimeter Workshop which is their choice to attend...shall be interesting! More tomorrow!

The Literacy part of the day was Explanation Writing where we looked at the PowerPoint.

This will be broken up and different parts concentrated on over the next few days. Children were very excited about the drafting and publishing possibilities. More about that later!

Ran out of time quickly for reading but was mostly about what the routines will be, and that students could choose from a wide range of Reading Options when they were not doing Guided Reading with me or related reading activity. More on this later.

The afternoon session was introducing them to the Class Wiki and especially the Wiki Promise


We made a start on our Research Unit. The children have been looking at Communication so I wanted to see what they had learned previously so they worked on an Inspiration diagram 'Fact Recall'. Tomorrow we are going to look at how to create a research question and find keywords.

Visit www.moblyng.com to make your own!

Saturday, March 21, 2009

Animation and Digital Cameras

I worked with a group of children and a teacher today showing them how they can make a simple animation. They are studying Maori Culture and Protocols on a Marae. Their focus is on Karanga (Welcoming onto the Marae), Hongi (greeting) and Wero (the challenge). The teacher would like them to show their understandings of these protocols by creating animations, so the class is divided into 3 groups each going to depict the 3 different foci.

Team Members
Each group needs to have a
- camera person
- tripod holder
- set designer
- several people in charge of animating and moving the characters

Planning
- research, gather information
- storyboard
- write script
- collect animation objects and set material
- animate using cameras
- edit adding text and music
- publish as movie, DVD or slideshow

Set Design
It is important to have an inanimate object like a tree or a building so that it really looks like the characters are moving. I have suggested coloured fabric for ground cover and sky. Students will also collect small rocks, sticks and stones.

Characters
We discussed what the characters could be made our of and these are some of the choices
- plasticine
- pipe cleaners and pegs
- small dolls
- Lego

Filming
- the tripod needs to be steady and all bolts and handles screwed securely
- the camera needs to be securely set into the 'foot' of the tripod
- one person operates the camera, one person holds the tripod
- one person animates their own characters
- the photos must be 'framed' within the Set (we don't want to see what is behind or above the set)
- all characters need to be firmly secured with blu-tak so they don't move

Editing
- download all photos to iPhoto or My Pictures, put them in a folder so that they are easy to find
- upload photos to iMovie or MovieMaker
- before dragging the first photo down to the movie tray, set the speed (0.01) and in iMovie (turn of Ken Burns)
- drag rest of photos down to the Movie tray (Ctrl - A for Win, Command-A for Mac)
- if the photos are not the right speed then highlight them all as above and adjust the timing
- add a Title slide at the beginning, then a credits at the end
- finally add music, crop if necessary
- save Movie file and then export to your computer and/or to a blog or a wiki

Monday, March 16, 2009

Marking Students work

One of the questions I get asked a lot particularly when I run my courses is 'How can you keep up with the marking of students work that is completed using the computer?'
The most obvious way is to print it out, but for most classrooms in our school that is not always a practical solution...
One: because the Printer does not always behave itself as it should
Two: it's always running out of paper and nobody replaces it
Three: we want colour and it is not a colour printer
Four: somebody pressed 'Print' a few times and now we have several copies
Five: we are reducing our carbon footprint

The next solution that teachers try is getting the kids to save it to their own folders. That could work!...depending on where the folders are. If they are on one central computer, then it is not too difficult to retrieve their work (if they save to their own folder!) This will only work if 'you' the teacher 'teaches' them how to save to their own folder. One of the most common professional development acts I have to do is 'teach teachers how to save to folders', understanding how to navigate to where items are saved is one of the most fundamental actions of successful computer use. If you have a projector in your classroom then demonstrate it regularly, don't assume that students know how to do it. I always 'talk' my way through the actions I am performing so that they can see what I am doing, while I am performing that action.
"Now I am going to save this file by going to File-Save, I look at the top here to see where I am saving, is that the folder I want to save in? No, then I need to click on My Documents here, then double click on my folder here, what does it say at the top of my dialogue box? Am I in the right place? OK, click Save."

But the next problem we come to that is quite time consuming is going into every student's folder to retrieve the work they have completed. So this is when you need to teach the children 'How to manage themselves'.
Step One: Create a folder on the main computer used or if there are more than one, create a folder on the Server in the Student Disk
Step Two: Call it 'Marking Drop Box'
Step Three: if you are expecting a lot of marking, then make sub folders in this folder in either Curriculum areas or group names
Step Four: Train your students how to save to this Marking Drop Box
Step Five: Train your students how to retrieve their marked work from Drop box and place back into their own folders
For the teacher this is much more manageable. You are able to go to one place to view and mark student work, and if you are the teacher that prefers to do marking at home, then copy the folder to your laptop.

This will only work if the students and teacher are trained to follow the procedures. Make up a Step by Step guide to saving and retrieving.

Thursday, March 12, 2009

Fact or Opinon: Evaluating Websites

Children have difficulty evaluating information from websites for relevancy and accuracy.
In a previous blog posting 'Helping children to become better researchers' I talked about how to create the research question and find keywords. But what happens when they click on Google and find all those 'hits' about that topic? If their keywords are really good, generally the quality of their hits will be pretty good as well...but how do they really know? They don't! Unless they have been taught how to critically evaluate a website. This latest blog post from Langwitches titled 'Don't believe everything you see online' provides many useful links to websites and helpful hints on how to develop 'critical evaluation' tools.
I like to use a Graphic Organiser with guiding questions where students can evaluate their answers and decide if the website is creditable or not.

Tuesday, March 10, 2009

PowerPoint, Visual Dioramas, Screen Beans and Animation


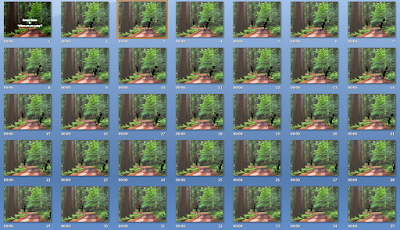
I was with a teacher yesterday who had been working with children on my 'Visual Diorama' idea. Some of her kids had discovered 'Screen Beans' and had been adding them to their Dioramas. She wanted to know how to make a slideshow of all of her class dioramas. Once I showed her that I suggested she might like to try a simple animation using the Screen Beans and the Backgrounds in PowerPoint.

Step One
Search for a suitable background in PowerPoint by clicking on Insert - Clipart. Type in the search term background. Click on a background to select it. Resize it to fit the slide.
Step Two
Type in the search term 'Screen Beans' in the Clipart search box. Click on the screen beans of your choice. Place them on the first slide.
Step Three
Click on the slide in the slide preview panel, press Ctrl D (Command D for Apple) to duplicate the slide. Move the screen beans by clicking on one, then use the arrow keys on your keyboard to move them one or two spaces. Duplicate that slide. Repeat until you have finished your animation
Step Four
Go to Slide Transition and deselect on Mouse Click and click on Automatically After and leave the timing at 00.00
Press F5 or click View Show to play your animation.
For it to work really well, you will need a lot of slides. For five seconds of animation I created 46 slides.
This activity is great fun, very quick to do and a great introduction into the world of animation!

Kidspiration as a mindmapping tool

One of the teachers I have been working with recently is trying to integrate ICT into her daily programme and wanted some easily achievable activities her junior children could do in the lab based around her topic of 'Our Friends'. The school has the software Kidspiration and so far her children have been making basic mindmaps around certain ideas and topics.
The children know how to create symbols off one main symbol and type in information.


I showed this teacher that when you are clicked on a symbol you can change it to a picture and still keep the writing or add writing underneath it. So now the children are going to extend their thinking on their topic and add pictures by clicking on the name of their friend and adding what they like to do. So before the students go to the lab, they need to survey their friends to find out what they like to do.

Once the students have finished the mindmap task, they will then analyse their mindmap and make comparisons and assumptions that they will then present to their group. The rest of the group will compare with with their mindmaps and students can hypothesise what these results mean.
This is also an ideal time to do some 'just in time' teaching with the children, if you see students who are coping quite well with the task then teach them some more skills, such as in this case how to colour the symbols so it differentiates each idea, or how to change the shape of the symbol in the centre. Before you know it, this idea will spread around the lab as other students pick it up and pass it on.
I emphasise to teachers that they should do this same task several times (in different topic areas) consolidating and building on the skills children have developed.

Tuesday, March 3, 2009

Organising Activities for Reading and Maths

If you have made some group specific activities in Kidspiration, Inspiration, PowerPoint, Keynote, Word or Pages, then you need to make them easily accessible. One method that used to work well for me and that I have introduced to many teachers is to make your group folders i.e. for Maths, they might be called, 'Squares, Hexagons, Triangles' and leave them on the desktop. Copy the files/activities for the week into the folder. Teach students how to find their folder and the activities. For Maths never put more than 5 activities into their folder. If there are fast finishers make a 'Fast Finisher' folder with activities they have completed in the past, sometimes I will choose ones like Time, Measurement and Geometry for maintenance practice.


You can also include Interactive Worksheets in Word, Pages, PowerPoint or Keynote with hyperlinks to the activities in that folder or to websites. This example to the right has been created in PowerPoint, and the screen captures are pictures of the actual online activity. These games are linked to the websites as a follow-up to what has been taught in Maths that week.

The following example has been created in Word. This is an interactive Reading worksheet with links to Inspiration activities and space to record their answers.


And this is one of the examples of the Inspiration worksheets the above Word document links to.

If all of the related files are kept together in the same folder then you will not have any trouble accessing all of the files. But do remember one thing! When creating activities for students, save them as templates! If students have to save their work for it to be marked, teach them how to save to their own folder.
Interactive PowerPoints that hyperlink to games do not need to be saved by students. The only things that need to be saved is when changes have been made.

Before I send children off to complete activities, I always go over the activity I expect them to complete. Don't assume that they know how to do the activity i.e how to click on a hyperlink. Talk them through how they are going to do it and especially if they need to save a copy to their own folders.