Wednesday, September 21, 2011

Infographics and Inquiry Presenting

All of my schools at the present are embroiled in Rugby World Cup fever. Students are researching and finding out information not only about their own country but also adopted countries. Soon they will need to present this information so I have been talking to teachers about how 'Infographics' are a great way to present student work.
Students will have created their research question, found their keywords and used the smart researcher tools to find information.
They will have copied photos or graphics to folders and the internet references to WordProcessor (Word, Pages, Google Docs) along with 'brief' notes copied from Internet pages that answer their research question. They will synthesise their notes and present facts and 'hopefully' they will present new ideas with conclusions and inferences.

Now how could they present it?
The following example has been created in Comiclife.
Or in PowerPoint
 
Or in Keynote
 
The following diagram lists all of the possible elements  that could be included in an infographic
 
The criteria for an infographic presentation is
  1. Keep a balance between graphics, text, charts and numbers
  2. Be aware of what colours work well together, not too many and remember complimentary colours (opposites of the colour wheel)
  3. Check all of the time that you are answering your research question
  4. Reference your facts, graphics etc
  5. Include graphics, photos, graphs, flow charts, graphic organisers, statistics
  6. Add your own inferences from the information presented
For younger children you can simplify the criteria
Some of the programmes that would be suitable for creating infographics
  • PowerPoint: more suitable then Word as all of the different objects will not move around randomly + version 2007 and 2010 have great Smart Art graphics
  • Pages or Keynote (for Mac): easy to move objects around and place them
  • ComicLife: great Title graphics, easy to create 'Chart' type infographics
  • Kidspiration and Inspiration: Mindmapping type infographics
One way to introduce students to 'Infographics' is to show them a variety of examples and examine what make them great presentations, itemise the best points and use them in their own infographics.
I am gradually adding examples to Scoop.it that are suitable to show younger students.
Click on this link to see examples suitable to show students.

I will be following up with more posts on this subject as I develop ways of how to teach students how to find the right sort of information, graphics, symbols etc to suit their presentations.

    Tuesday, August 30, 2011

    Photo of the Day - Google Presentation and Wikis or Blogs

    Andrew wanted to showcase his students 'Photos of the Day'. He thought about just uploading the photos to a wikipage. I suggested he created a Google Presentation, embed it on the Wiki with a link.
    So when the students upload their photos to the Google presentation they will be updated on the Class wiki.


    Click on link to add a photo to the presentation

    Thursday, May 19, 2011

    Publishing Junior stories

    One of my junior teachers has had a frustrating time trying to publish her Year one students' stories. She uses Word and has a frame for her Picture box and a text box below that for the story. After she has saved 24 pages of this format and typed in her students' stories, text boxes and frames have moved and she has the tiresome task of moving all the boxes in place again. She asked if there was a way of anchoring the text boxes, but unfortunately there is not. So I came up with the idea of making a PowerPoint Template.
    1. Open up PowerPoint, choose plain template
    2. Go to File - Page Setup and change Page Orientation to Portrait
    3. Next choose a Layout, choose one with a Text box space, she deleted the title
    4. Next resize the text box and add a square shape for the picture box, move them to where you want them, set your font and size
    5. Remove the bullet points from text by clicking on the bullet point button on toolbar
    6. Last step is fix the rulers, because when you remove the bullet point the second line of text indents and you need to fix that


    Once you have the template looking the way you want it, then duplicate the slide by clicking on it once in the slide tray, Press Ctrl D or Command D however many times you need copies.


    Go File - Save as and Choose Template from the dropdown menu. Make sure that you know where it is saving to as when you choose 'Template' it defaults back to Template folder.

    Now when this teacher publishes her students' work, she can open up this template, type in the stories, no text boxes will move around and she can print it out for the students to illustrate. Once she saves it, she still has the blank template to use over again.

    Sunday, May 8, 2011

    Day 5 e-Learning Classroom

    Part of good management of students and the creation of 'self-managing' students is the time it takes for them to become self managing and what management strategies, you...the teacher, have put in place.
    As an issue arises then create a management strategy to take care of that problem. One came up yesterday, this school does not allow students to print from their computers, only the teacher laptop can print! Some of the children have publishing to print, others need to print out their drafts for conferencing and further editing. The teacher could end up being harassed by impatient students all day wanting their printing!
    Solution: We will add a 'Ready to Print' option to the Writing management board. Students move their name labels to that part of the board. The teacher will find the saved file in the student's individual folders and can print all files at at time that is convenient.

    We wanted all of the children to have some typing practice, so instead of handwriting sessions everyday, nine children would be allowed to go to the computers to practice their typing and do their spelling activities. The rest of the class would do their handwriting and spelling. We made a timetable that would run for the whole week. This will go on the wall so all students know when it is their turn to be on the computer during this time.

    We used the 'easi speak' for a different purpose today. One of the students has a problem with writing things down, computers are difficult and so was the iPad. The main difficulty appears to be with spelling and writing/typing fluently. This child has very good verbal skills. She managed to write down her ideas and after she conferenced her work with the teacher rather then get her to go through the pressure of writing or typing again we got her to publish with the 'easi speak'. She did a perfect job in one 'take'. She was also the first person to publish in the class and had the biggest smile on her face when she was informed of this.
    The 'easi speak' continues to be one of the most popular choices for reading. Students love using the microphone to record their voices speaking and even more so...hearing themselves back through the speakers.
    The teacher will need to set up a timetable for this activity as some children were complaining that they haven't had a turn yet. Small whiteboards are great for 'booking' time and equipment and students are more likely to use them mainly for the novelty of using whiteboard markers!

    Mobile Listening Post

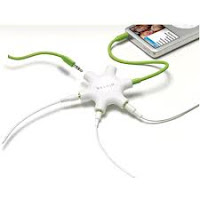
    I brought in an old iPod of mine that has audiobooks loaded on it. I have a few copies of Stormbreaker so I set that up as an reading option for students. Several students enjoyed listening to the story and reading the book at the same time. To manage this well, if there are students listening at different times then they will need to make a note of the time where the story is up to.
    This is a great followup activity for students particularly if the group are reading the book as part of their instructional reading.
    Teachers can make their own audiobooks of student basal readers, record them on GarageBand (Mac) or Audacity, then download to an iPod or MP3 player. Use a splitter so up to 5 headsets can listen at one time.


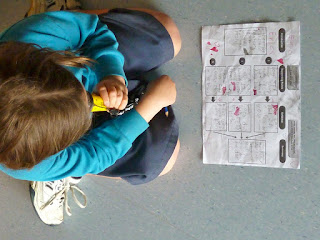
    Another popular reading activity is 'Grab some friends and perform a play. The students also have to record what they are doing with a 'Flip Video' Camera (these are not in production anymore, so if you can find one, grab it as it has so many uses in the classroom). The benefits of students recording is
    1.  it keeps all students on task
    2. the play can be watched at any time by anybody
    3. the performers can 'critique' their performance
    In this photo is an interesting group with one girl and several boys with strong characters. From the beginning you could see that there were going to be 'co-operation' issues. From several observations I feel that the use of the camera kept them more on task then they normally would be, as they wanted to have a movie to show the rest of the class so got over their 'leadership' problems quickly. 

    Collaboration

    Even though these students are working 1-1 on these computers, they are still talking to each other, they are asking questions, providing answers and helping each other.
    They are on swivel chairs that helps with the collaboration, they can move and turn to each other. When this photo was taken, the boy on the end had a problem and the two girls to his right were helping him.

    Thursday, May 5, 2011

    Day 4 e-Learning Lead teachers

    I worked most of the day with the lead teachers from the e-Wrapper cluster.
    The following presentation has all the links to what we discussed
    1. The Horizon Report
    2. The Traditional, Digital and e-Learning classroom
    3. Teacher level of integration
    4. The e-Learning Classroom resource wiki
    5. Classroom Spaces
    6. Digital Toolkit
    7. e-Learning action plan
    8. Digital Capabilities Matrix
    9. Cybersafety
    10. Assessment, Measurement and Planning ideas
     
    Everglade elearning
    View more presentations from Jacqui Sharp

    We then talked about how the Everglade Learners Wiki is being used as a Portal for students with all their resources and activities.
     

    Wednesday, May 4, 2011

    Day 3 e-Learning in the Classroom

    Maths
    Students are working well through the activities, some of them need to be reminded that they have to record their scores from the online math activities. Children who were working on the mimio workshop are learning to be co-operative with each other so that they share ownership of the mimio pen!


    Reading
    The reading session went extremely well today. Students were moving from task to task independently.


    We introduced two new options, the audiobook on the iPod touch and the Easi-speak microphone.
    The students with the Easi-Speak had a great time recording themselves reading a story and listening to themselves reading it.
    Students sat with the iPod  touch, the splitter and head phones and listened to 'The Lion, the Witch and the Wardrobe' audiobook.


    The children are also very fond of using the flip video to record their plays.


    Writing
    The students are getting into the swing of using the Writing task board. They were all moving their names across to the appropriate column. Some of the students started on the Conferencing options. At this school the students can't print from the school computers, only the teachers laptop is enabled to print so we are adding another management space to the Writing task board 'Ready to print' so that the teacher knows which students have work to print out, and can print it out at a time that is convenient to them.


    Handwriting, Keyboarding and Spelling
    The blending of these subjects is working well. Students know who are on the computers for Keyboarding and Spelling, while the others do their Handwriting and Spelling in their books. Keyboarding is already starting to improve.
    Several children are confident with the Home keys (asdf jkl;) so I have started them off on the Keyboarding cards.

    Tuesday, May 3, 2011

    Day 2 e-Learning Classroom

    Another great day in the classroom. The children settled down to their tasks straight away and were not phased by all of the teachers in the room observing them.
    Maths
    Most of the students realised that they needed to write their progress and answers in their maths books. The teacher of the class was amazed by 3 children who were working on the 3 computers in the withdrawal space. He expected them to be not on task, but they were totally involved in what they were doing occasionally helping each other at the same time.


    I also noticed that the teacher was able to leave the students (He feels comfortable enough to let go of control)  who were working on the workshop for short periods of time to look around the room at what the other students were doing. There were not enough computers for all of the students but they all managed to co-operate well with each other.


    Reading
    The students understand how the task board works now and are eager to try out the different options, especially the iPad stories. So that we can find out what activities the students like doing the most they will fill in the following tracking sheet

    This will assist in future planning of activities and also identify individual student preferences.
    One group of students went with the 'Grab some friends and act out a play'. We gave them a Flip Video camera and they videoed their efforts. Their first effort they viewed away from the rest of the class, lots of laughing but they soon realised that they needed to make some drastic changes. They went outside and did it again and did a great job!


    Spaces
    Gareth created a secret space today and introduced it to the children as a 'Quiet Space'. The students used it well today. This photo was taken when another student came and told me that the child in the Quiet Space had been there for a long time, when I went and looked this kid was reading quietly with another student.


    Writing
    Gareth talked about Conjunctions in the writing process today. Teachers who were observing were amazed at the level of engagement with the children that were working on the iPads and iPhone. Students are now starting to use the Writing Management Board as they move from the Drafting stage to Editing and Conferencing. We will be introducing the conferencing choices tomorrow.

    Handwriting, Spelling, Keyboarding
    Already the students are concentrating consciously on their keyboarding skills. Most children had 2 hands on the keyboard and were touching the space bar with their thumbs. We have timetabled 9 children everyday to do Keyboarding exercises rather than Handwriting and then they can continue with their Spelling activities after 10 minutes of typing practice.
    The students who aren't on the computers continue with doing their spelling in their spelling books.

    P.E
    Gareth has made a 'Large Ball skills' assessment sheet for his children. They looked over what was expected of them, students took turns at videoing groups of other students. When they came inside they watched themselves and critiqued their performance. They now have their learning goals for the next P.E session.


    Art
    The topic at the moment is Disasters so Gareth prepared a PowerPoint with images to do with disasters. Students will be creating their own disaster icons for posters. Everybody started off on paper and I worked with a couple of children on Paint. More about this tomorrow!

    Monday, May 2, 2011

    Starting an e-Learning classroom

    This week I am working with another teacher in a Year 4 classroom. We have the beginnings of setting up an e-Learning classroom. This teacher has had to make quite a few dramatic changes in teaching practice to operate fully in an e-Learning environment.
    The class has 4 computers and 5 laptops. I have taken in 3 iPads and today I even let the students use my iPhone.

    Gareth and I met for one day to plan last term.  I talked to him about what an e-Learning classroom can look like. I created a cutdown version of the action plan that my teachers in the e-Learning classroom are using (theirs goes for the year).


    I created the wiki for the class and we are treating it as the portal for the students to their learning.
     We introduced the children to it first thing in the morning. Before school started I taught 3 students how to make a weemee and they continued through the day when there was a spare moment to teach someone else.
    Rules
    We talked about rules.

     The emphasis was on being co-operative, collaborative and self-managing.


    Maths
    We introduced the Measurement task sheet

    and then the Measurement Workshop

    and finally the Measurement Website. The students were then given the choice of what activities they had to do, we only had time for a short trial so they were allowed to go to one task and try it out. Some students worked in pairs, some worked alone, some worked on the Workshop with Gareth. The children grasped the concept of working like that incredibly fast and there was a wonderful working hum in the classroom. It will be interesting to see how they go tomorrow self managing themselves.

    Reading
    Gareth has created interactive worksheets around the student readers for the week. I will post examples of these on the website and in a blog post tomorrow. Students read with the teacher, then worked on their interactive worksheet and then their third task was to choose from the options. More about this tomorrow.

    Writing
    I created this teaching PowerPoint on Argument writing and Gareth introduced it today.
    Students were shown the Word Graphic Organiser template.
    Nine students worked on computers drafting straight onto the Graphic Organiser. Two worked on the iPads and one on the iPhone. The rest worked on the print outs of the Graphic Organisers.


    As it was not the full amount time allowed for writing today, they will continue with this tomorrow.

    Keyboarding
    Keyboarding was introduced briefly and all students pasted in a photocopied version of a keyboard, and coloured in the home keys. As I wandered around the students while they were typing today I was constantly saying "Two hands on the keyboard, thumbs only on the space bar!"

    It was a great start to the week. These 7 and 8 year old students adapted so easily and quickly to the new ways of doing things in their class. On my advice the teacher got rid of some desks and replaced them with tables. The students were very surprised to start off with but very quickly got used to their tote trays and sitting wherever they wanted around the tables. We will be having quite a few teachers observing over the week so it will be interesting to see how the students cope with that as well, judging by today they will be all little champions.

    Thursday, March 10, 2011

    Self review and setting Goals

    I have been talking quite a bit to teachers about students documenting their own Personal Learning Journey. It is loosely based on 'Ipsative' Assessment which is the measurement of where we were, where we are now and where we want to be. The following diagrams build on that with the student deciding with the teacher what they are going to have to do to succeed with their goal. The junior one is more simplified then the senior example.
    Click on the diagrams to see them in full view.
    Junior

    Senior
    These were created in Kidspiration and Inspiration. Students can type into them or they can be printed out and students write in them.

    The examples are available for download on this site

    Monday, March 7, 2011

    Visual Publishing

    I saw students publishing their autobiographies today in Word, with a border and a fancy heading. Children were working alone, typing one finger each letter as they copied from their writing books. They look bored and uninterested in what they were doing.

    Another teacher said to me, I want to do something more interesting or exciting when I get my students to publish their autobiographies, they aren't able to write much. This school has very limited access to internet, they cannot publish online so we needed to use what was available on the computer. They had Inspiration version 8! I was elated!
    I started showing the teacher how they could create a visual autobiography.
    We set up a template for students to use...
    Then we looked at how you could add pictures, Inspiration 8 and 9 have a great search feature (unfortunately the search feature is blocked at this particular school).
    Other choices of graphics are students creating their own graphics in Paint, Artrage or Kidpix.
    Or you could go to Google Images and find graphics, there are quite a few free graphic sites that show up in Google Images such as http://www.cartoonclipartworld.com/
    Use Google images to find graphics of maps and places as well.
     
    There are lots of skills children will learn 'just in time' and 'as needed' in an authentic context.

    Thursday, March 3, 2011

    Keyboarding skills...do we need to teach them?

    I am hearing the same old story at all my schools and I am seeing it myself as I wander around the classrooms. Teachers are complaining about the slowness of students typing on the computer. I am astounded that I still see Year 6 children typing with one finger while they rest their head on their other hand!
    So...do we need to teach typing skills?
    Yes we do! They do not gain keyboarding skills by 'osmosis'.

    But it doesn't have to be a new subject that has to be taught, it can be integrated into what you are already doing in the classroom.
    One method I use is to print out a keyboard for each child, stick it in the back of Spelling book, practice your spelling words by typing them...
    ...or in the back of a Handwriting book, practice your Home Keys before you start your Handwriting.

    Plain Windows Keyboard
    View more presentations from Jacqui Sharp

    Make up a learning centre with laminated coloured keyboards
     
    Colour Win Keyboard
    View more presentations from Jacqui Sharp

    and bag these activities for use in Options, tumbles or Wet Day activities
    Typing Practice Cards 64
    View more documents from Jacqui Sharp

    Part of your observations, working with and walking around should involve you always encouraging students to

    "thumbs only on the space bar"
    "Pinkies only on the shift and delete key"
    "always rest your fingers on the Home Keys"
    "don't cross over the Magic Line"
    You can also teach keyboarding skills while modelling writing.

    For Mac versions of Keyboards and more keyboarding ideas and resources go to my Keyboarding wiki page.