Friday, December 3, 2010

Using Social Media in the Classroom

Facebook is well known as personal social media. But it is also possible to be a useful tool to use in education.
Jane Danielson is documenting her school's journey into the use of Social Media and how it is becoming an integral part of the communication lines between school and community. http://janedanielson.blogspot.com/

A lot of the teachers that I work with are disappointed with parent  interaction with their blogs and wikis and would like feedback from them on children's work. Jane has discovered from the large take up of 'Liking' the school's Public page and through comments left on the school's public profile page that a lot of parents have Facebook and that they seem to regularly check it. Feedback from parents say that they like this method of communication.

How could you use Facebook in the classroom?

You can add a 'Public Profile Page' to your personal account. This is your connection to the parents in your class.This will enable you to post updates to your Public Profile page like
  • updates to wikis and blogs
  • links to websites or articles
  • reminders about events that are coming up
  • requests for parents to check student pages
How does this affect your personal Facebook?

When somebody clicks the Like button on your Facebook link, they will receive only the updates you put on your Public Profile page, they do not get your personal updates and you do not get theirs.

How do I set up a Public Profile page?
  • Log into your Facebook page
  • open another tab on your browser (Ctrl T or Command T)
  • go to this website http://www.facebook.com/pages/create.php 
  • click on Local Business, choose Education
  • Type in the Page Name in space provided 
  • Tick the 'I'm the official representative...'
  • Click Create Official Page
  • Click on Create Page
  • Add a brand image and information 
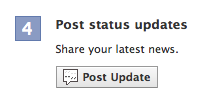
  • Add your first post (it might be a link to latest blog or wiki update) by clicking on Post Update
 

  • Click on the Like button
  • Now you need to create a Like box to go onto your wiki or blog for parents to click on so that they will receive your updates
  • Click on http://developers.facebook.com/docs/reference/plugins/like-box
  • Paste in the internet address for your Public Facebook page
  • Make changes to the width and colour of theme
  • Click on Get Code and copy the code
  • Go to your Wiki, click on Edit Navigation, Click where you want it to go, click on Widget then other, paste the code, click Ok and then Save
  • To add to a blog, go to the Dashboard, click on add a Gadget, click on HTML/JavaScript, paste code, click Save, drag the gadget to where you want it on the side panel, click Save


If you want to communicate with the parents of  your children in your class, then try using the social media tool of Facebook to reach them. This just might encourage them to look at your blogs and wikis and comment on their children's work.
But be aware this is not for your children's use, Facebook has a R13 rating so your students if they are under the age of 13 are not legally allowed to have a Facebook page so it is not appropriate for them to 'Like' your public profile page let alone comment on it. If this does happen, then you will need to inform parents through a post on your Facebook page about the legalities and also talk to the children in your class.


Saturday, November 27, 2010

Talking Technology and e-Learning to Parents

I was asked to talk to a group of parents recently about e-Learning. I usually talk to teachers so this was a new experience for me. A small group of parents got it, a lot didn't!
So...what was the problem?
One man said ' I may be old fashioned but what about the 3 'R's! It is an important question, the answer... is that they are still there but are being delivered to students in a different way.

Another thing that bothered me was a parent saying 'My daughter cannot tell me what 7x 4 is, or it takes her a while to think what the answer is (she is obviously using strategies to work it out). I thought to myself 'Well really? How important is it to know what 7x 4 is?' We have calculators available to us everywhere. I know of very successful accountants who don't know their timetables, they use the tools that are available to them to solve the problem. Some parents of today expect their children to be taught as they were taught when they were at school, as this parent said 'I learned by rote and I know my timetables'. The argument could be that this is the type of learner he is, or he has a stronger intelligence in that area but his daughter does not.

 The point is that the skills we need change with time and technology... as a checkout operator in a Supermarket in the late 70s, I had to count back change to customers as per company protocol e.g if an order was $10.30 and they gave me $20 then I had to count back the change to the customer
'$10.30 and 20c is 50, 50c is $11, $2 is $13, $2 is $15 and $5 is $20.00
A few years later machines came in that gave you exactly how much change you needed to give to the customer. That skill I had, has not been used up until this day.

Parents do want to see 1-1 computing. They want children to have their own computers. I see 1-1 computing replacing rows of desks with rows of laptops, and the blackboard of yesteryear is now an IWB. The only difference between the classroom of the early 1900s and now is the technology. I am seeing a lot of teachers using their IWB as the old 'chalk and talk' but that will change as they get more familiar with the software and start creating authentic resources that students can use.

Parents were worried that Handwriting and Spelling would not be in the programme anymore and what was a maths and reading session going to look like. We reassured them that those programmes still happen, the teaching and learning still happen but with the aid of a variety of technologies in a student centred classroom.
Another parent said he was worried about the work load on the teachers, how could they manage 26 students doing different things with lots of equipment in lots of groups. The Principal was able to answer "We teach like that in traditional classrooms!' She went on to explain how we group teach.

Traditional style teaching
  • A group with the teacher for instructional work,
  • A group working on individual specific worksheet/ or reading book activity that had been designed for their group
  • A group on computers individually working through a graphic organiser Character Study
  • A group listening to stories on the listening post
  • A group reading from their group box of books at their level
e-Learning class
  • A group with the teacher for instructional work using iPads to tap out answers to questions teacher asks
  • A group working together in smaller groups on a specific online worksheet/ or reading book activity that had been designed for their group
  • A group on computers (in pairs or threes) working through a graphic organiser Character Study, discussing character traits, looking through the novel in their hands to find more information, sharing their answers
  • A group listening to an audiobook on the iPod via a 5 way splitter whilst reading from the paperback copy at the same time
  • A group choosing from the reading options which could include a variety of activities using technologies or non digital materials
It was interesting to see and hear parents reactions to this way of learning. Human nature is to go with what we know and what we believe works, change is unknown and threatening. We need to think about how we can help parents to transition to this way of learning.
The e learning classroom
View more presentations from Jacqui Sharp.

Since I wrote this post I have come across another blog post by Celia http://ccoffa.edublogs.org/2010/11/27/it-comes-down-to-trust/ Her post focuses on how parents are reluctant to let their students use social media and their lack of trust in their own children. She reiterates what I observed that there is a sense of fear amongst some parents and a lack of understanding of what social media and Web2.0 tools are.
Jane Danielson is documenting her school's journey into the use of Social Media and how it is becoming an integral part of the communication lines between school and community. http://janedanielson.blogspot.com/

Wednesday, November 10, 2010

It was one of those 'Oh wow' moments!

I was working with a teacher today who was distracted by one of his Year 5 boys that was working slowly in his bookwork. He commented to me that the student found it difficult to write and just as hard to work on a computer. He was finding it challenging to get much work out of him at all. I suggested the iPad, and as I had one with me we called the student up.  I asked him had he ever tried an iPad before... he had not!
I asked him to type a sentence about himself, his name, favourite sport etc. He started typing, see video below...

I looked at the teacher, whose jaw had dropped. He couldn't believe his eyes!
When I asked the student why did he think he could type so well on the iPad, he said he didn't know. But I think it is because his face is totally focused on one screen and he doesn't have to keep lifting his head from keyboard to monitor as you do with a computer. He was also able to edit a lot more quickly as students generally type a sentence, then look up and then delete the whole sentence if it is incorrect. This boy was able to see his mistakes as they happened and delete right then and there.
We also asked him to do the exercise he was having difficulty in writing on the iPad and he completed it in record time!

This has to be another argument for having iPads and iPod touches in the classroom! It can capture a reluctant learner to become enthusiastic, engaged and successful!

Go to http://ipodsiphonesineducation.wikispaces.com to find out what iPod Touch and iPad apps I am recommending.

Tuesday, October 12, 2010

Creating Math Activities

Tania wanted to know how to create clock math activities in Inspiration today. In 10 minutes she had made 2 activities that children are going to be using independently and in groups using the mimio.
Step 1: Google 'Blank Clock Faces'. Click on Line Drawing in the side panel options
Step 2: Drag the clock face of your choice onto the Kidspiration or Inspiration page
Step 3: Draw the lines by clicking on the line tool on the toolbar
Step 4: Change the lines into arrows by going to Link - Arrow Direction
Step 5: Add a text box below the clock
Step 6: Click and drag around the whole clock picture and text box, press Ctrl or Command C and paste on another part of the page, repeat until you have covered the page. Save your activity as a template.

Use the same template to create other activities.
The same activities can be created in IWB notebook software as well. Do a search for clock and you will find a clock face, hands and digital display.
mimio, Smart notebook, Activinspire

Thursday, October 7, 2010

Webcams and Kids

With the latest of rollouts of laptops a lot of them have webcams built into them and I am amazed at how many teachers do not realise that they are there! (Apples have had them forever!) This is a valuable resource that you can use with your children.

  • read your story to the camera, turn your book around to show the picture (upload movie to wiki or blog)
  • take a photo of your art masterpiece (print out or post on wiki or blog)
  • read/act a play (place the laptop somewhere where it can see a large area, record your play, edit in Moviemaker or iMovie
  • create your avatar (use the photo editing features of your camera to add effects)
  • record your speech and watch it back (critique and make some improvements)
  • Skype or iChat with students in other classrooms
  • Skype or iChat with invited guests and ask prepared questions
  • take your laptop for a walk and show your viewer what you are seeing
  • record a newscast for podcasts

Monday, September 13, 2010

Creating Reading Activities

I was talking to a teacher today about creating activities for her reading programme. I like to start with my top reading group which means that the other groups will be able to do that reading activity when they reach it. Kidspiration and Inspiration are perfect for this. The activities don't take long to create especially if you create activities using old templates.
Here are a couple of examples using the book Rosie at the zoo.

After they have used these as followup activities they can then be stored in a folder for that reading group as extra reading activities, make sure the books are also kept together in a 'Book Box' so that the students can use them with the computer activities.

Monday, September 6, 2010

Wallwisher and the Christchurch Earthquake

I was working at Willowbank School today and the teacher was talking about how she wanted to use Web2.0 tools with her kids. With all that has happened in Christchurch with the earthquake, I thought it was important for the children to have a forum they could talk about it on. Wallwisher was the obvious choice.
This is a Wallwisher I have set up for the different ways you can use Wallwisher. Thanks to the people who have added to it...great ideas.


Friday, August 13, 2010

Space Technology Unit

The latest technology unit I have written is on Space. The focus of the unit is to understand that several models need to be made and tested before a prototype can be created.
Click on the Full button to see this document in full screen.
The Juniors are going to be making Origami spaceships and the Seniors will be creating spaceships according to their own specifications.


The Seniors will be looking at Richard Bransons 'Spaceship Two'


The seniors also have a PowerPoint with links to the websites and movies that will help them with their tasks.
The assessment for the Seniors is to itemise the steps that it has taken to get to the final design of Spaceship Two.

As an Extra...
These students worked on the Volcano eruptions last term so suggesting that they animate the orbiting of planets around the sun was not a difficult task for them to achieve. They were able to apply the same techniques they used with animating 'Erupting Volcanoes'.

Which of course lead to them wanting to animate spaceships.

Students can create their own 'Spaceships/Rockets' in Paint or Artrage. These are then animated in PowerPoint or Keynote.

We used Artrage to create backgrounds.

Wednesday, August 4, 2010

Lifting Student Achievement with Technology

This is a presentation created by a teacher to present to the Board of Trustees. This teacher is a self confessed Luddite who two years ago did not like working with computers in her classroom. Now she is totally sold. What is so wonderful about this presentation is the evidence the teacher has to how computers and the use of the 'mimio' have 'significantly' lifted student achievement in her class.

Younger Students and Computers - you need to teach them how

Teachers of younger children tend to not let their students use the computers for independent activities, mainly because
  • the children have no mouse skills
  • they don't know how to single or double click
  • they don't know how to navigate within the website or the game
With the younger ones and the ones that not so able, use the math activities as a teaching tool, rather than as an independent activity. This way students will learn how to do the activity with you modelling and coaching them. I always talk through what I am doing with them. In the  example to the right, I would show them how to open the file, I would have spare keyboards available and when we are ready to type the answer into the square, I would say
"How many suns are in this circle, lets count them, see how I'm moving the mouse pointer over each sun. So what is the answer? Now we will type the answer into the square below, but first we must click in the box, now we type the answer." Then we would repeat that process but this time I would be asking, what is the next step we have to do, once they have the idea I would then hand the activity over to the children. After a while of demonstrating whilst teaching, students will be able to do the activities independently. This is the ideal time to teach troubleshooting as you will see what children have difficulty with.

In the example below I would teach children how to open up the PowerPoint file, what button to click to turn it into a slideshow and then how to get the PowerPoint pen. If you have an IWB or mimio, then you can save the file as a PDF and then import into the notebook software so that the notebook pens can be used.
Count
View more presentations from Jacqui Sharp.


Don't ever assume that young children know how to use the tools or the buttons, they need to be taught by you demonstrating it.

Sunday, August 1, 2010

Make a Poetry file

I remember many years ago as a student teacher having to create a poetry file for an assignment. I cut up cardboard, used fancy felt-tips, wrote a different poem on each cardboard sheet, illustrated them...it took hours and hours.
When I visit junior classrooms, I often see blown up Poem Cards that teachers are using with children. I advise teachers to make IWB notebook files of their poems. Once they have made their poetry files and saved as a single document, they can use them in conjunction with their Poem cards.
They can use all of the tools such as 'highlighter, shapes, pen tool' to teach conventions of text and poetry. The blown up Poem Cards are still used as independent reading activities.

If you do not have an Interactive Board, but you do have a projector than make your poem files in PowerPoint or Keynote (or Google Presentation) files.
Use your whiteboard markers to teach conventions of text and poetry.

Thursday, June 10, 2010

'Time Wasting' Kids who take ages to finish work

There is a very simple and effective solution to the problem of students who drag out the publishing or presenting of work on the computer...


  1. You have 'X' amount of time to do this work
  2. If you do not finish it, you print it out and finish by hand

Do not fall for the 'I haven't finished.... I need to be on the computer again tomorrow!'

Children very quickly decide that they don't like presenting 'half and half' work and will miraculously speed up and finish their work.

Monday, May 31, 2010

Kids as Commentators

More and more students are being invited and given access to online discussions, forums and comments on blogs. This is wonderful, the classroom walls are open and children have the freedom to make observations and remarks on other student's posts.

Consequently, it is important for teachers to train children in the 'art' of commenting. There are several rules of netiquette they need to follow. They have to understand that this is an extension of the classroom walls and that rules that they follow in the classroom cross over to their behaviour in online environments.
Here is guide to start students off as online commentators. Use this as a springboard for talking about the type of comments we make, what are good questions and answers for forums and discussions, and most of all how this is a fun, engaging, collaborative extension of our learning.

Thursday, May 13, 2010

Volcanoes, computers, animations - Authentic Context

One of my schools are studying Volcanoes at the moment, and as we live in the city of Volcanoes (Auckland), this was a great opportunity to link our learning to an authentic context.

ICT component: View this slideshow, click on the links and follow the instructions on the slide.
Work through the PowerPoint file 'Making a Volcano'
  • watch the animation on how a volcano erupts
  • Look at the Shake, Rattle and Roll site, take notes on what the animations look like
  • Look at the animations on Weather Whizz kids and take notes
  • Look at the different types of Volcanoes on Volcano Explorer, build your own virtual Volcano and see how it erupts
Follow the animation steps in the Animating objects PowerPoint and practice making an animation.

Once all of the students have made the animation, share them with the class and talk about if the animations are in the right order. Revisit Volcano Explorer and look at all of the different volcanoes and identify the different ways the volcanoes erupt.
Ask the students can they identify what type of volcano they have, and if the order of eruption correct. If not then they can work on their volcanoes to  make the necessary adjustments.

Further Activities:
  • Select one of the Volcanoes in Auckland, take a photo or find a photo, crop it, identify what type of volcano it is and create a volcanic eruption simulation
  • create a volcanic simulation of your local volcano, upload to Slideboom, embed in a Glogster poster explaining the type of volcano it is 
  • Read 'Under the Mountain' by Maurice Gee (a fantasy fiction based some of the volcanoes in Auckland) Create a map showing the positions and type of volcano,  create a simulation for the 3 different volcanoes

Thursday, April 22, 2010

PowerPoint as a modelling and teaching tool

I was helping a teacher with ideas of how to integrate ICT into her classroom programme. I asked her what her shared book was and suggested how she could teach 'Shared Book' using the class computer and a group of children. (Read the Shared book with the children first)

  • Start off with a blank page, introduce the shared book, ask what the title is, type the Title in
  • in the sub title box type by Room #
  • Insert a new slide
  • Read the text from the Shared book and then start typing it in
  • ask questions like "What do I need to type first?" "What goes at the end of the sentence?"
  • Computer skills are taught as they are needed i.e. "How do I make a capital letter?" "Who can show me how to type a full stop, what finger should I use?
  • As the book was one about 'I can run, I can draw' etc. The teacher taught the children how to take photos, so these 5 and 6 year olds took their own photos and the teacher inserted them into their PowerPoint. 
  • To finish it off she chose a design template and this was all done as part of the lesson with the children participating alongside.
 All this was part of their shared book learning experience, and put their learning into an integrated, authentic context. They now have this story on the computer as an extra reading activity.

As a follow up to this, students can take photos of other things they 'can' do and add them to this shared book or create an new one.

Saturday, March 13, 2010

Lab lessons with Juniors

I was working with a computer lab teacher today looking at ways to work with students. She had a class of Year one students came in!

You need to put some sanity saving measures in when working with a class of 5 and 6 year olds in a lab. They can't sit for long, because they are too excited, so it is best to get them on the computers straight away. If possible don't have them sharing as their collaborative skills at this age aren't that great!
Beforehand you will have needed to teach a couple (or more) of more able students to help the others to log on, and then click on the programme they are going to be using i.e KidPix or Paint. Let them go for it, experimenting with the tools or doing their favourite thing. Once everybody is logged on and in the programme, THEN you can start to add some order to your lessons.

The following are the stages you could go through with Juniors
These happen over several sessions!
  • free play
  • while they are in free play, work with individuals showing them a new tool i.e dragging background pictures and adding stamps
  • show them the typing tool and type their name (you will need a display on a wall that shows the Upper and Lower case letters for those who haven't mastered them yet)
  • type the words they know how to write (have high frequency words on the wall for students to look at)
  • first official lesson can be drawing a picture about their topic or what they are writing about in their classroom LIMIT THE TOOLS! Pencil and Paint Can ONLY
  • Repeat this session many times but bring something new in when the students look ready for it like typing your name (I also teach new things to students who look like they are capable of it as I walk around)
  • next session might be typing a sentence
  • at some stage teach the more able students how to save (they will help you to save students work)

  • once the students are used to all these steps then you might introduce a new programme/Application
  • at the same time talk to the students about the magic line, put two hands on the keyboard, this hand can't cross over this side of the magic line and the other hand can't cross over that side of the magic line (I put little pieces of folded paper between the keys to create a magic line)
Once the students know the routines and how to use one or two of the programmes, then start using your computer lab time as curriculum teaching and learning time. Writing is a good area to start with. Use the projector to model your writing genre. Students can have their writing books (there should be a container of pencils in lab). Send a small group of able students to the computers to draft (use Kidpix, Kidspiration, Pages, Word etc). The rest of the students can be drafting in their books. Children could be sent off to the computers to...
  • draw a picture for their story
  • Type a heading for their story that could be printed out
  • find a picture in Kidpix that could be printed out
While this is all going on, integrate keyboarding skills at the same time
  • always remind them of the magic line
  • thumbs only on the space bar
  • pinkies only on the delete key
  • rest fingers on the home keys (those students whose fingers can reach and are ready for it)
With little ones it is all about learning the basic skills and developing that fine motor control. Some students will need more time 'with free play'. If you have students that need mouse skills then set up Interactive Learning Centres such as...
Mouse Practice
    Mouse Practice PowerPoint Show version
    View more presentations from Jacqui Sharp.

    To make these Learning Centres follow these instructions

    Finally, limit the time students are on the computers, 30 minutes is plenty of time for younger children to be staring at screen. If you have extra time over, then bring out the cameras and take photos that could be used for motivational writing or for publishing their work.
    Just remember at this age more than any other age, the students will develop their skills at differing speeds...some a LOT faster than others. Identify those children that have those skills and use them to help you to teach the others. You will find that children learn best from each other!

    Wednesday, March 10, 2010

    Researching smarter

    There are still a lot of teachers that are sending children off to do 'research' on Google using one key word.i.e bird (253 million hits later). When they finally find a page that has the information they want, it is invariably printed out, and trawled through looking for information.
    This is long, tedious, boring and usually irrelevant!
    Become a smart researcher with some of these strategies

    1. have at least 3 key words if you are looking for information on birds, what sort of birds are you looking for, what country etc so now the Google search becomes 'bird native wading' and because we want to search for New Zealand Birds we click on  pages from New Zealand.
    Now we have 10,400 hits!
    2. Open up a mindmap/Graphic Organiser (I like to use Kidspiration or Inspiration, or you can use online versions) Create a simple mindmap


    3. Go back to the internet site you have chosen, press Ctrl F (Command F for Macs) type in one of the key words from questions in mindmap like 'eats'

    4. The word eat did not appear on my page so I used a synonym such as feed, click the next button to see each instance of the word feed until you see a sentence that will answer your question
    5. Go back to your mindmap and type in the information you found
    6. Go between the Internet site and the mindmap adding information
    7. Add a picture to your mindmap by right clicking on a picture in your internet page, select Copy Image, go back to mindmap and paste (Ctrl V)
    8. Don't forget to reference where information and picture came from

    Model this way of researching to your class.
    Use this model in all curriculum areas.
    Become a smarter researcher yourself and your students will follow!

    Friday, March 5, 2010

    What to do with a few minutes spare?

    There are few games that I like to play with students when we have a few minutes spare, you need at least a projector (and laptop) and even better a mimio or IWB.

    Free Rice
    Free Rice is my first favourite. For every question you get right 10 grains of rice gets donated through the World Food Programme.


    The reason it is my favourite is that if you click on Change Subjects you can choose from other subjects.


     I particularly like to do the Geography questions as most children in New Zealand schools have very little idea of where other countries are in the World.


    Lemons for Literacy
    Then there is Lemons for Literacy. With this site every correct answer helps somebody to read in America. Money is donated by the site creators to purchase literacy materials.

    With this site you can click on the speaker symbol to hear the words and meanings.

    You can also change the type of game by clicking on the 'Defintion Matching' dropdown menu to choose Word meaning. You can also choose a subject rather than General (some of the choices are Business, Medical, School, travel or hospitality). You can also adjust the level of the words.

    Free Poverty
    Lastly there is Free Poverty
    The goal of this game is to test your knowledge of places on the map. Every correct answer means that freepoverty.com will donate 10 cups of water. The further away from the correct spot and the cups of water decrease, if you are too far away there is 0 cups of water awarded. Unfortunately it does have advertisements on it so check what they are advertising that day before using with your class.


    The reason I like using the mimio or IWB is that students can use the pens to interact with words and the maps rather than one person using the computer.


    And here is one more I have just found

    Free Flour
    Free flour used to donate one spoonful of flour to World Hunger, but they are looking for sponsers. You can still play the game for free.

    In this game you get questioned General Knowledge questions. Check out what the advertisements are advertising before using with children.

    Wednesday, March 3, 2010

    Simple but an effective way of Publishing

    A teacher said to me today that her children were always publishing in the same way, in Word with a frame and a title. She wanted to know some different ways to publish. I showed her my slideshare presentation '59 ways to publish'

    Journal Publish
    We decided to keep it simple and look at only using Word and PowerPoint. We looked at the Journal story idea. When  you look at school journals, most of the pages have pictures in the background and text overlaying the page.
    This is an example of two Word pages side by side. The photos cover the whole page, some of the photos have been lightened with the Washout button and then text has been inserted using textboxes. (Remove the background colour and line from the textbox by clicking on the Fill can and selecting 'No Fill' and the outline shape or line button and select no outline or line).

    Publishing using PowerPoint Templates

    One single PowerPoint page can be used for publishing as well. Open PowerPoint, choose a design theme.
    Select a slide layout, type in text, add graphics. Print out single page.


    You can adjust the colours of the template by
    Mac: Open the Toolbox and choose a colour theme from Document Theme


    Windows: PowerPoint 2007 choose from Colours

    Monday, February 1, 2010

    This day in History

    One of the activities I timetable children to do each day before school is to find out what happened on this day in History. Some of the sites I had been using were American (and were the day before, because of time difference).

    Sometimes the information on those sites were not really appropriate for children in New Zealand. I came across this site New Zealand History online. What a great way to teach our students New Zealand history.

    How to use in the Classroom
    IWB
    Make a file using the notebook software of the IWB you are using. Add the links to the first page.

    I also link to a weather site and current news site.
    Students are timetabled (3 a day) to click on a link, read the page, decide which item they are going to copy and take a screen capture to a new page.
    This becomes part of our oral language time in the morning where all 3 students have a chance to report back to the class what they have found out. They particularly like using the IWB to navigate to their pages and we always take the opportunity to use the highlighter pens to identify key words, nouns, great adjectives etc( what ever happens to be our focus at that time.)

    Projector only
    Make these links in a PowerPoint and hyperlink to the address or the pictures. When presenting back students click on the link and find the item they want to talk about.

    No Projector or IWB
    This still works well without a projector, students take notes of what they have found out and report back to the classroom. This is great activity for making sure that all children get hands on time using the computer and the internet every two weeks.

    Monday, January 18, 2010

    Ancestral Seafarers

    I have written a series of technology units that have an ICT focus and I am going to share them over the next few weeks.
    The first one is Ancestral Seafarers. Students will use Google Sketchup, Digital Lego and Paint as some of the ICT tools.
    This unit is designed to integrate into the main Science and Social studies focus.
    Setting: We have been looking at how the early Maori people migrated to New Zealand. They used many forms of navigation tools such as the stars, migrating birds and tidal flow.
    Brief: It is the year 2010; we have sophisticated technology available to use. If we were going to make the same trip and were able to use the technology available today to navigate, then what and how would we use it? Plan a model using Sketchup, Digital Lego or Paint and identify all of the technologies you have used.
    Specifications:
    • The boat you travel in can be no longer than 20 metres
    • You must justify the use of each technological item
    Follow the slideshow and complete the tasks.
    Discuss this
    'So canoe traditions do not only explain origins. They also express authority and identity, and define tribal boundaries and relationships. They merge poetry and politics, history and myth, fact and legend' (retrieved from TeAra)
    What does this mean? How can it relate to your own design?

    Try out the tutorials in either Sketchup or Digital Lego
    Draw your plan itemising all of the technological improvements that you will use for navigation.
    Level 1: Describe your plan itemising all of the technological improvements that you will use for navigation.
    Level 2: Present your plan to the class explaining the outcome you are developoing and describing the technological improvements
    Level 3: Describe your outcome explaining how it will suit what you plan to do with it, identify the technological improvements and describe in detail how they will assist with the final outcome
    Level 4: Identify what the need or opportunity was, describe the technological improvement and how it will benefit the stakeholders.

    TeAra the The online Encyclopedia of New Zealand is a wonderful resource to start with when researching anything to do with New Zealand.
    TVNZ on demand is another valuable resource and Waka Hui had several episodes on Ancestral Seafarers.